30
Mar
March 30, 2017
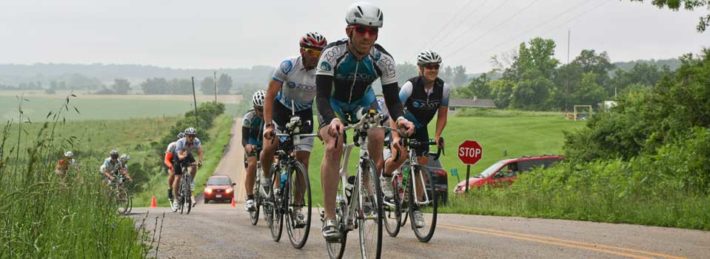
Cycling does not have to be a solo endeavor. In fact, one of the best ways to get better is to ride with people faster than you. However, before you go out to your first local group ride keep these tips in mind!
- Ask Questions: Prior to the start of the ride, ask the regulars questions about the group. Is it a fast ride with lots of sprints and tactics? Is it a no-drop ride where there are designated spots to wait for the entire group? Where does the route go? Is there a ride leader? Find the right group ride for you! Some will fit your needs and current abilities better than others.
- Half Wheeling: This is when you overlap your front wheel with the rear wheel of a rider ahead of you. Don’t do it! Ride handlebar to handlebar with the person next to you so that the whole group can stay tightly together and safe. The easiest way to cause a crash in a group is to cross wheels so protect your front wheel at all times!
- Pacelining: Most group rides utilize some sort of paceline, but there are a variety of different types that may occur.
- A double paceline is oftentimes used during warm up or when the speeds are slower. Two riders are on the front riding side by side at all times. Both riders pull off together, each to the outside, so that the next 2 riders in line pull through the middle to take over the front. This type of paceline takes up quite a bit of space on the road.
- Once the speeds pick up, many groups use a rotating paceline where there are 2 lines side by side but one line is moving quicker than the other line. Once the rider in the front of the fast line is finished pulling, he pulls off to the side (at the front of the slow line), and begins to slowly drift back. When a rider is last in line in the slower line, they drift back over to the end of the fast line and slowly move up as the front riders continue to pull off and drift back.
- Pulling Off: If two riders are at the front together, communicate so that both riders pull off SMOOTHLY at the same time. Oftentimes, riders will give an elbow flick to indicate to the riders behind them that they are finished at the front. If you are solo, move gradually to the side when you are ready but make sure that you do not slow down until you are completely out of the way of the rider behind you.
- Pulling Through: Once the rider(s) in front move to the side, it’s the next rider’s turn to come to the front and “pull.” As soon as there is space, immediately begin maneuvering forward at a steady speed. Do NOT surge ahead.
- Sitting On: If you are not strong enough to take a pull on the front, it is acceptable to “sit on” at the back of the group. You do this by letting the riders coming to the back of the group (the ones that just finished at the front) slide in front of you. It is helpful for you to vocalize to them that you are not pulling through so that they know to close the small gap you leave for them. The art of sitting on takes quite a bit of practice since sometimes you can let gaps form as you let other riders into the paceline. Another option is to take a decidedly very short pull on the front. Sometimes it is easier to stay in the rotating paceline and go to the front but just immediately pull off when you do reach the front.
- Maneuvering through a Group: Any movement that you do should be gradual and steady. Don’t immediately veer in one direction or slam on your brakes. Doing anything sudden will likely cause a crash.
- Obstacles: If you are in a very small group, verbally yelling for objects such as potholes, cars, road debris, etc can be acceptable. However, in big groups realize that the only people that will probably hear you are those a couple rows back from you. They may hear you yell something but are not sure the details, which then causes them to look frantically around for why someone is yelling. Generally, hand signals are more effective in large groups. Also, only point out obstacles that are worth noting (can cause damage to a bike or person behind you).
- Slowing Down: If the riders in front of you start slowing and cause you to need to reduce your speed, do so as gradually as you can. One way to do this to come out to the side a little to reduce the effect of the draft and let the wind naturally slow you. You can also LIGHTLY tap your brakes to maintain formation but do not slam on the brakes.
Riding in a group takes a lot of practice and time to get confident and comfortable. You may get frustrated by how early you lose contact and feel like you are fitter than some of the riders that last longer than you. Realize that this is very common though and just keep learning from each ride. Group rides are a fantastic way to meet fellow cyclists, gain fitness and skills, and have fun, so go find one in your area to try!
